Creating a Social Tenure Relationship is carried out through a wizard called New Social Tenure Relationship.
The module enables you to do the following:
Add a person or persons
Add a spatial unit
Choose a social tenure relationship type for each persons added
Upload supporting document that is related to social tenure relationship
To create a social tenure relationship, follow the steps below.
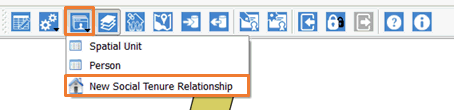
1. Start the New Social Tenure Relationship Wizard.
There are two ways of starting New Social Tenure Relationship Wizard.
Through Entities Menu by selecting New Social Tenure Relationship sub-menu.
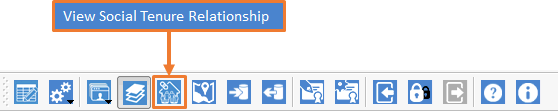
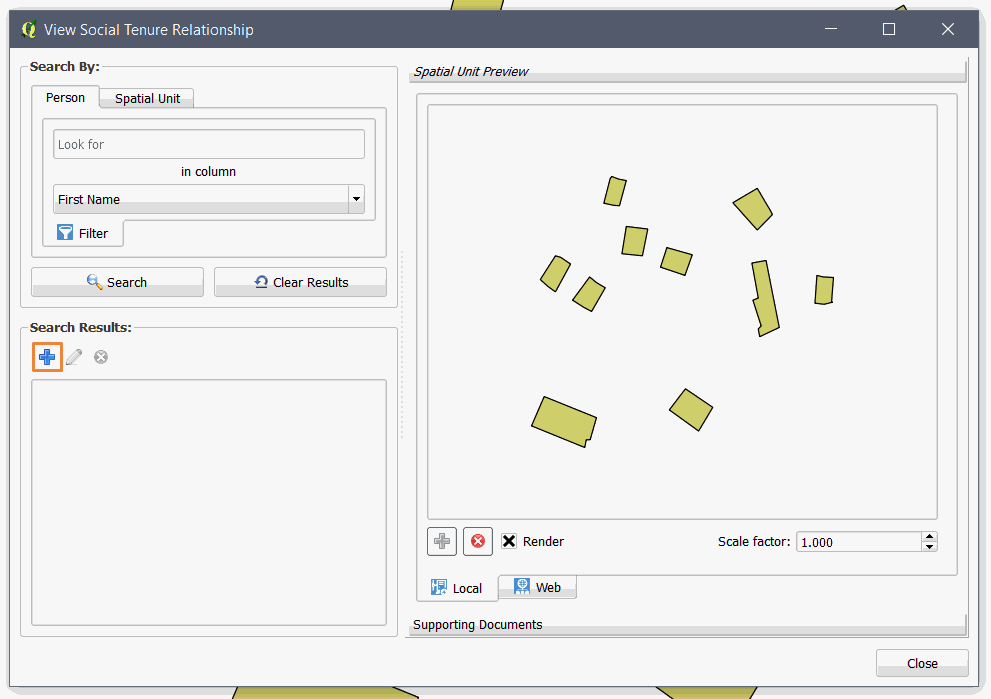
Or from View Social Tenure Relationship Module
First click on View Social Tenure Relationship button on STDM toolbar.
Then inside View Social Tenure Relationship, click on the add (  ) button,
located inside Search Result.
) button,
located inside Search Result.
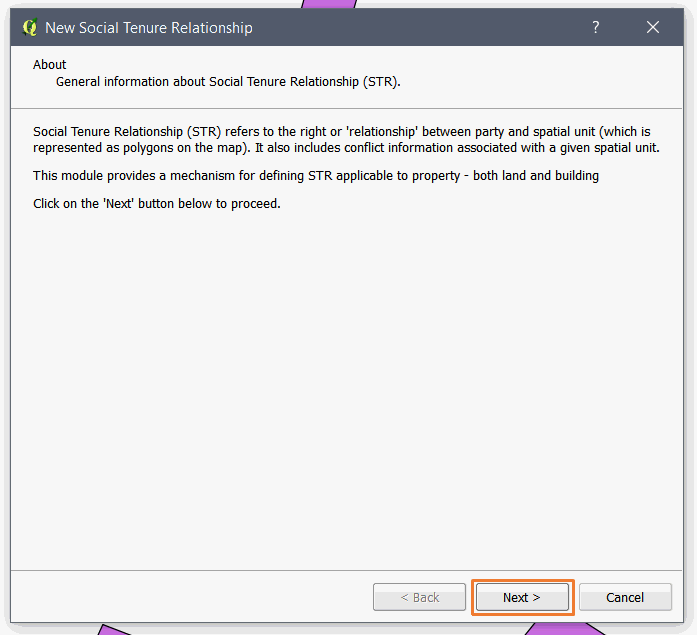
2. You will see the module below. After reading the description, click the Next button to proceed.
2. On Party Information page (see the image below), you can add the person to be linked to a spatial unit/structure/parcel. If you have allowed multiple parties for one spatial unit, you can add more than one person.
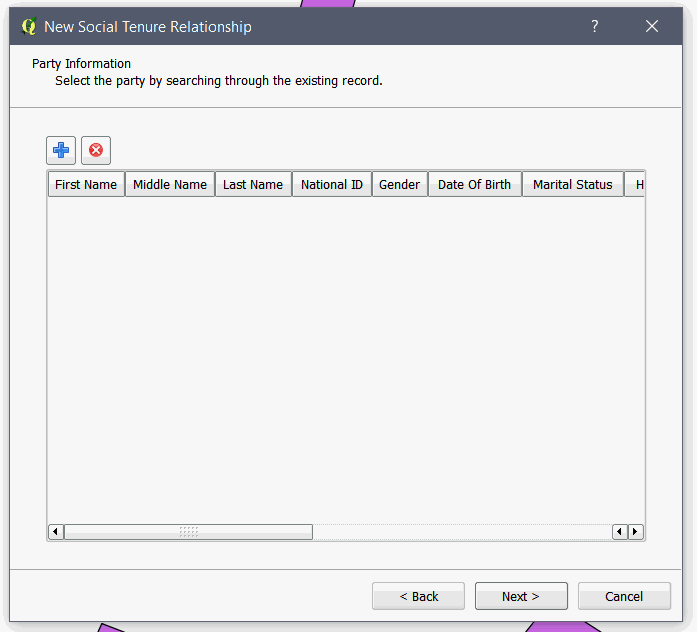
To add a person,
click on the add button ( ) to open the Person
Records.
3. Select a record that you would like to add. You can search for the person you would like to add. Then, select it and click on the Select button as shown below.
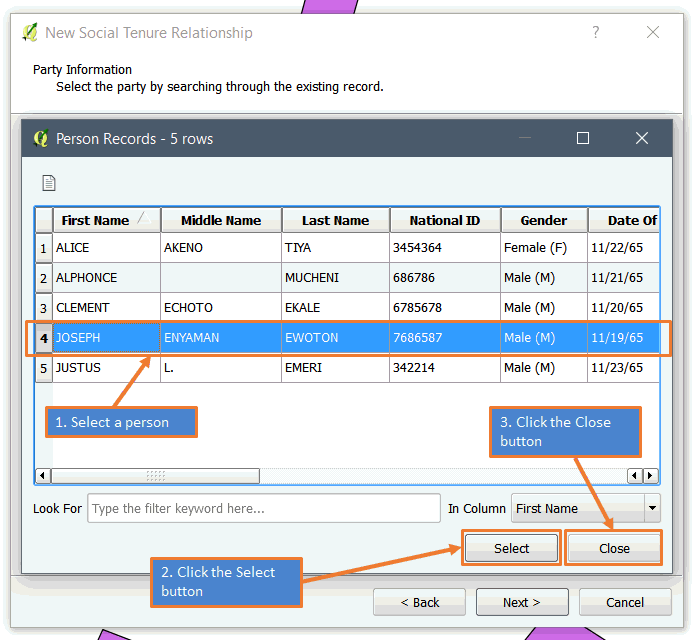
If you want to add multiple records that are not continuous, follow the sub-steps below.
a. Press the Control (Ctrl) key on your keyboard
b. While still pressing the Control key, select another record you want to add.
If you want to add multiple records between two rows, follow the sub-steps below.
a. Select a record that will be the first selection in the range.
b. Press the Shift key on your keyboard
c. While still pressing the Shift key, select the last row in the selection range
When you finish selecting all records, click on the Close button as highlighted in the image above.
Once you click the close button, you will see all the selected records in the page as shown below.
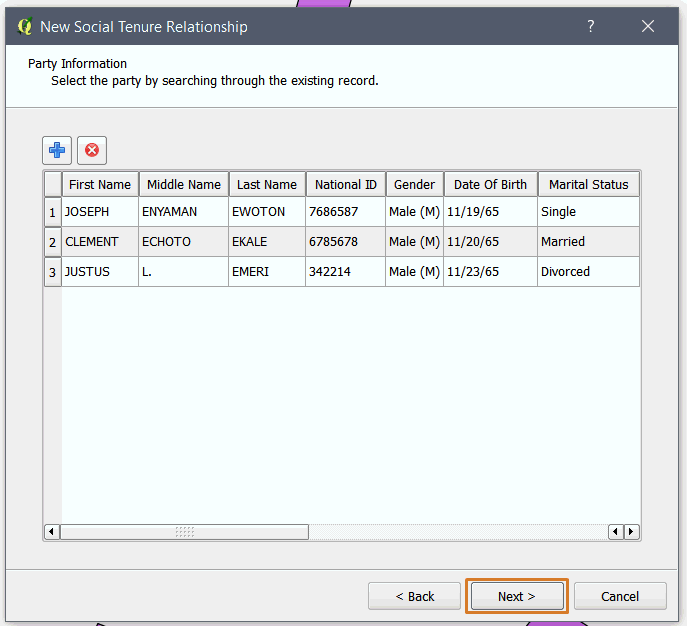
You can remove
records by selecting a record and by clicking on the remove button ( ).
).
Click the Next button to proceed.
4. Once you have
clicked the Next button in the Party Information page, you will see the
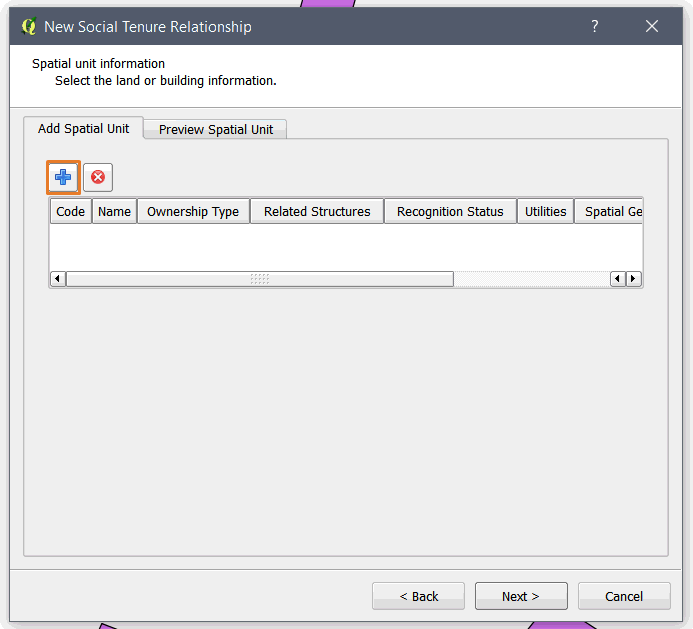
Spatial Unit/ Structure page, where you have to select a spatial unit
by clicking on the Add button ().
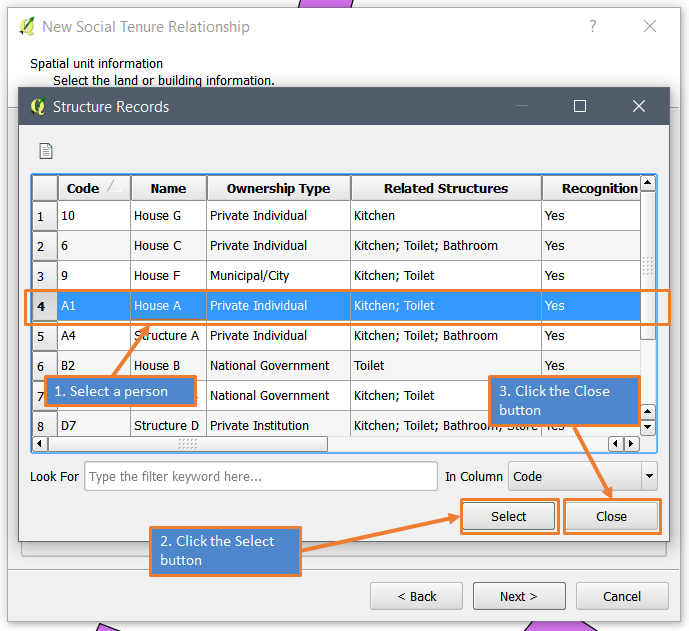
5. When you click
on the Add button (),
the Spatial unit/Structure Record Window appears to allow you select a
spatial unit.
Select one spatial unit that should be linked to the parties/ persons you have selected as shown below. You can use the search tool to look for the spatial unit you would like to add. Then, click on the Select button and click on the Close button.
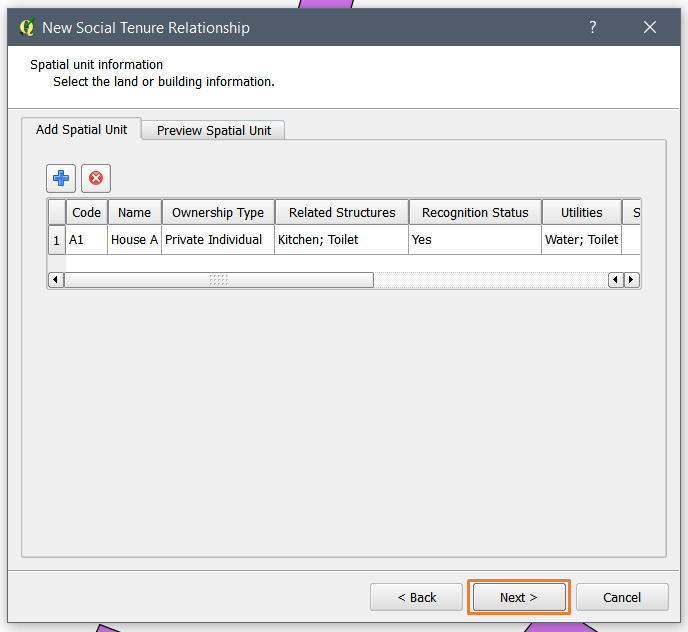
Once you have clicked the close button, you will see the selected records in the page as shown below.

You can remove
a record by selecting it and by clicking on the remove button ().
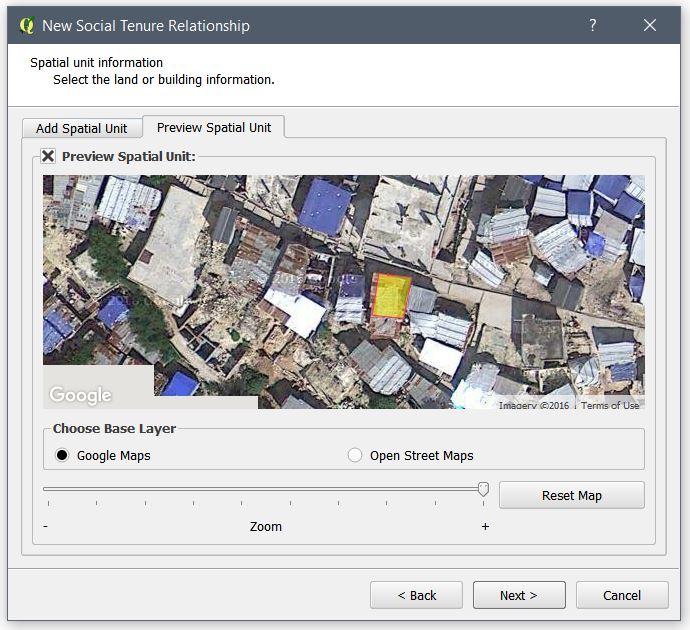
You can view the selected spatial unit in a web map. The base layers used are Google map and Open Street map. You can choose one of them.
To enable spatial unit preview, open Preview Spatial Unit tab and click on the checkbox Preview Spatial Unit as shown below.
This enables you to view the spatial unit on top of a web map you have chosen.
Note: Web overlay may vary from the actual representation in the local map.
Click the Next button to proceed as highlighted below.
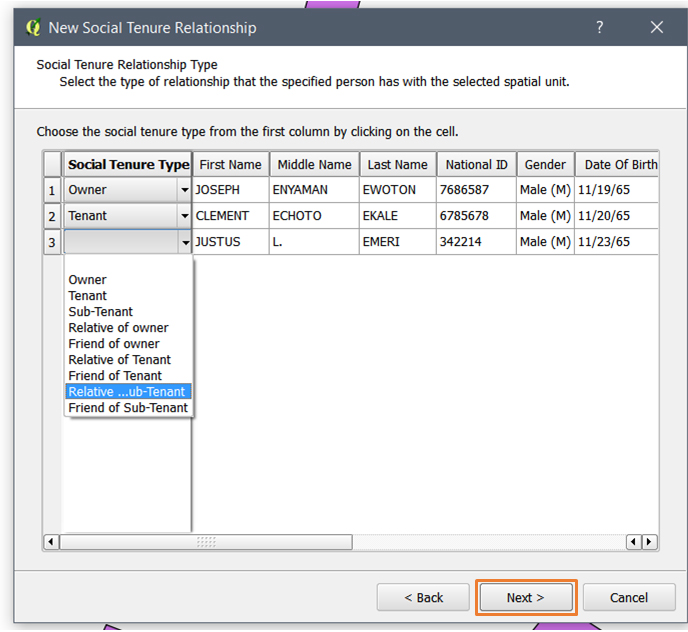
6. Once you click the Next button, you will see the Social Tenure Relationship Type page as shown below. This page loads a row for each party you have added in the Party Information page.
The first column is the most important part where you select the tenure type by looking at the person record next to it. The remaining columns of each row are used, so that you know for whom you are assigning the tenure type.
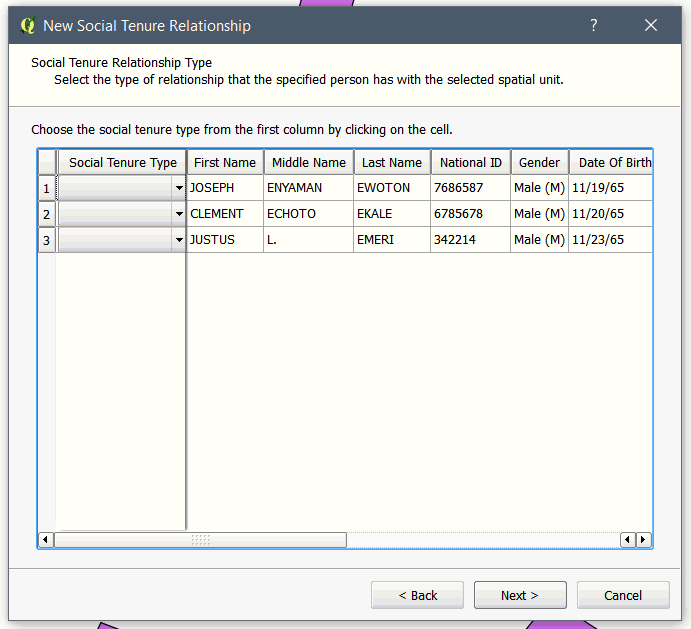
Select the tenure type by clicking on the drop down menu and choosing tenure type on the first column named Social Tenure Type for each row as shown below.
Click on the next button to proceed to the Supporting Document page.
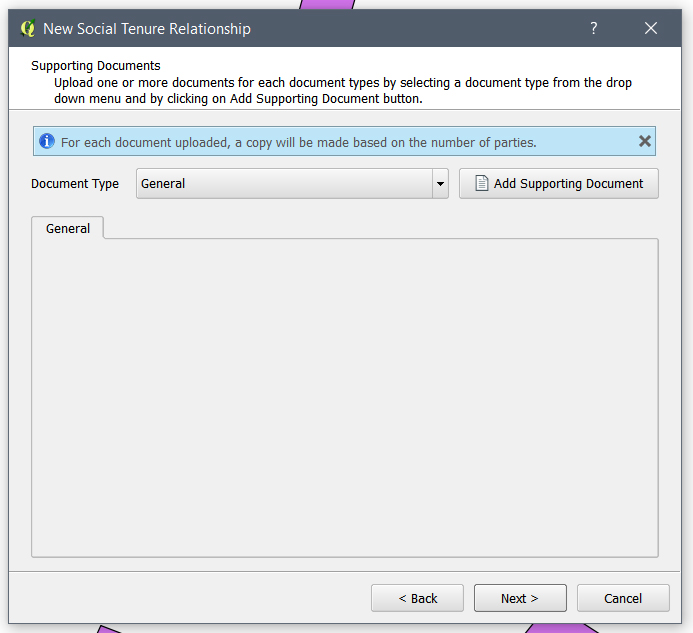
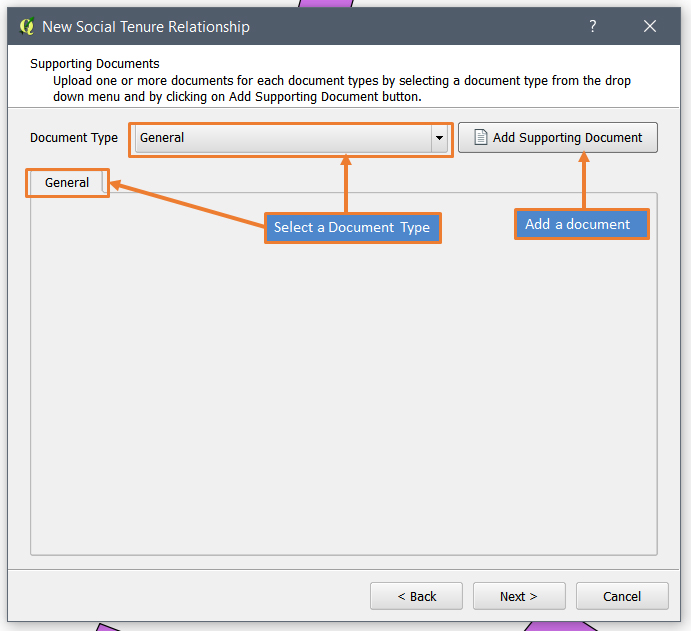
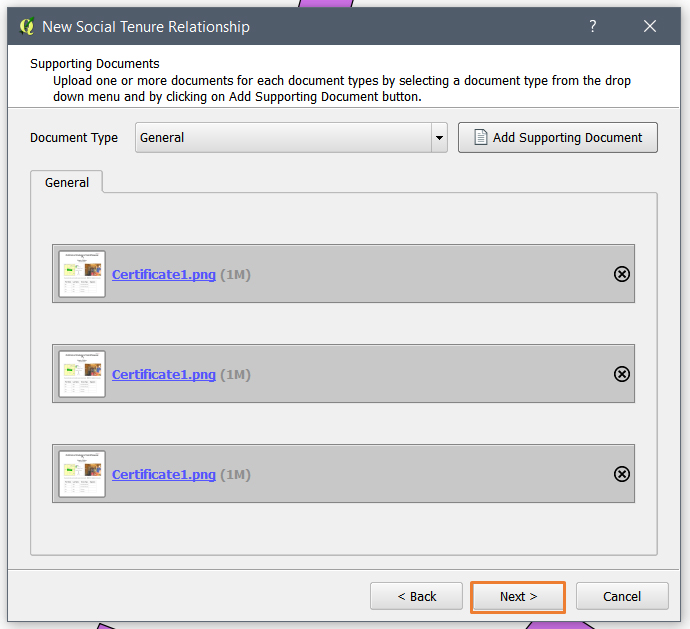
7. When you click the Next button, you will see the Supporting Documents page. The page enables you to upload supporting documents for each document type you have specified in the Configuration Wizard. This supporting document could be any relevant document that could be used as an evidence or information for the social tenure relationship.
If you have added more than one party, you will see an information that specifies that a copy will be made for each documents you have uploaded as shown in the image above. This is to mean that when you upload one document, a unique copy will be created for each party. Thus, you can access each uploaded document from the social tenure relationship of each party. If only one party is linked to the spatial unit, you will not see this message. The uploaded document will only be accessible from the specified person or spatial unit.
If you have more than one document type, a tab will be created and you can click on the tabs or the drop down menu to upload the documents in to it.
8. To upload a supporting document, choose on the document type by clicking on the tabs or the drop down menu. Then, click on the Add Supporting Document button as shown below.
9. Choose a file to be uploaded by looking for the files in your Windows Explorer. Then, click on the Open button as shown below.
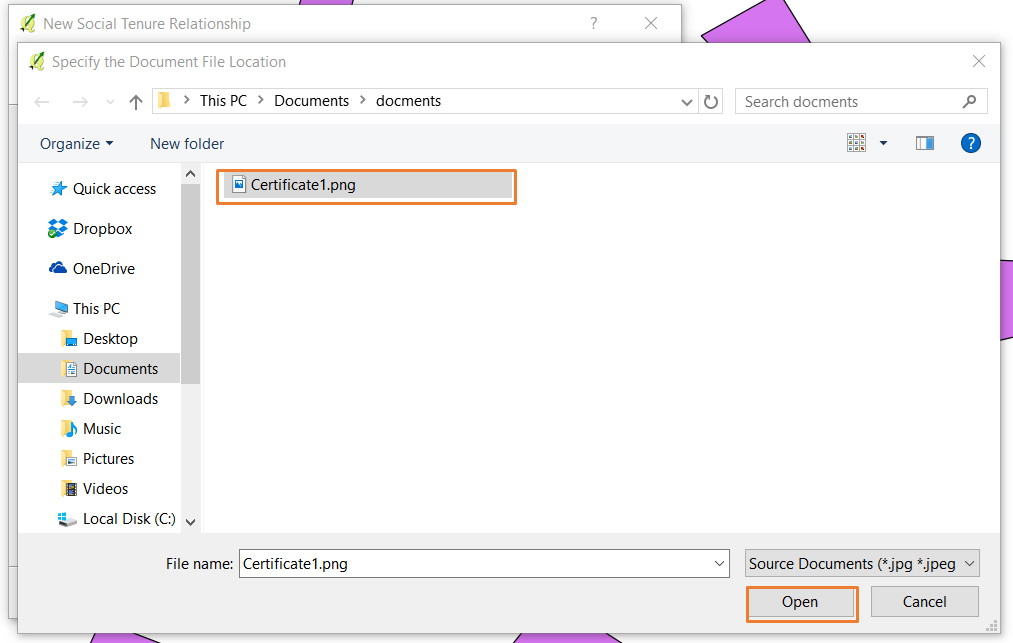
When you click the Open button. a copy of the same document will be created for each party as shown below.
You can view the
documents by clicking on the file name. You can remove the documents by
clicking on the Remove icon (  ) on each document
bar.
) on each document
bar.
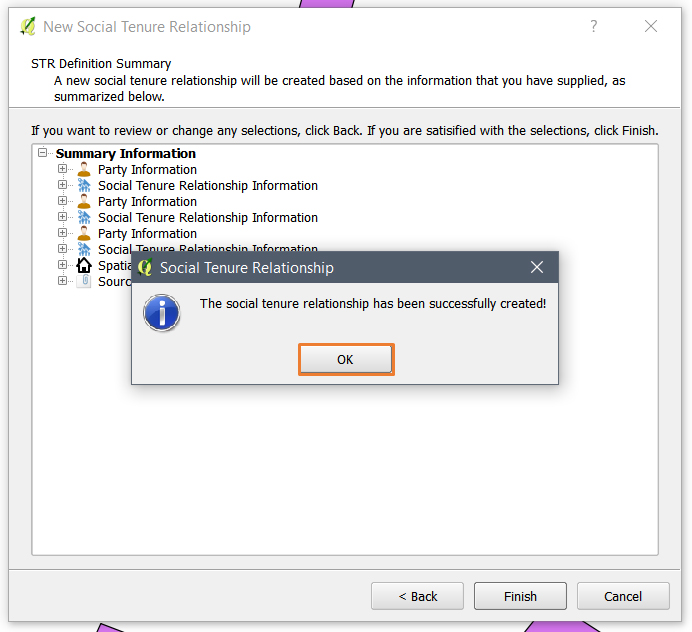
10. Click the next button to reach the STR Definition Summary page. Here, you will be able to see the summary of the social tenure relationship you are going to save to the database.
You can see more
details of what you have chosen by clicking on the Plus icon ( ) and you can also
see less of these details by clicking on the Minus icon (
) and you can also
see less of these details by clicking on the Minus icon ( ).
).
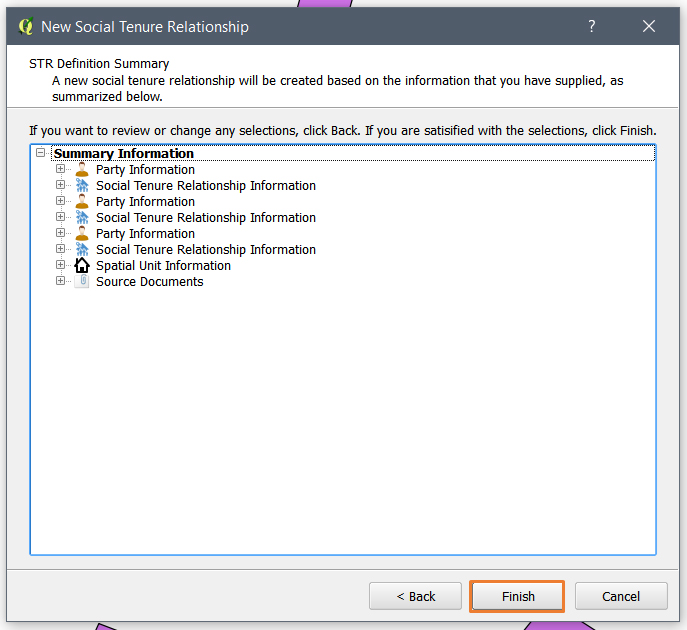
11. To save the social tenure relationship to the database, you have to click on the Finish button as highlighted in the image above.
Once you click on it, you will see a success message as shown in the image below. Click the Ok button as highlighted below, to close the New Social Tenure Relationship Window.