This functionality enables you upload a GPX files, downloaded from a GPS device into STDM spatial entity layer. The feature enables you to select coordinate pairs you want to be part of the feature to be added. Then you can add attribute information and save it the database.
To create a feature using GPX points, follow the steps below.
1. Add a spatial entity layer into the map canvas using the steps under Adding a Spatial Entity Geometry topic.
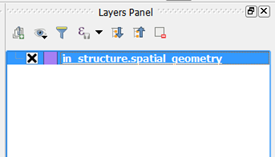
2. Once the layer is added select the layer in the Layers panel as shown below.
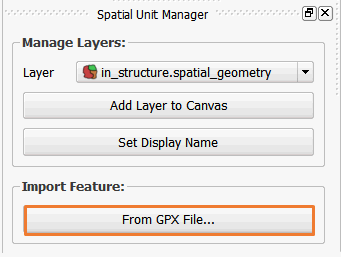
3. On the Spatial Unit Manager, click on the button From GPX File as shown in the image below.
4. A window will pop up to allow you to choose a GPX file from your computer. The currently supported gpx formats are Waypoint, Tracks and Route.
Choose Waypoint under feature types. You can also choose other formats if you know that your gpx file has them.

Browse to the location of the GPX file. For this document, the STDM Sample data gpx files are used. The sample data is located in .stdm folder under your user folder inside SampleData/Sample_GPX_Data folder.
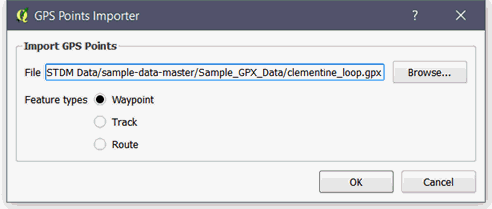
Click on the Ok button to import the points from the gpx file.
5. Once clicked, a GPX table is shown with all existing waypoints from the selected gpx file. In addition, it automatically adds a temporary layer with the points marked (see the image below).
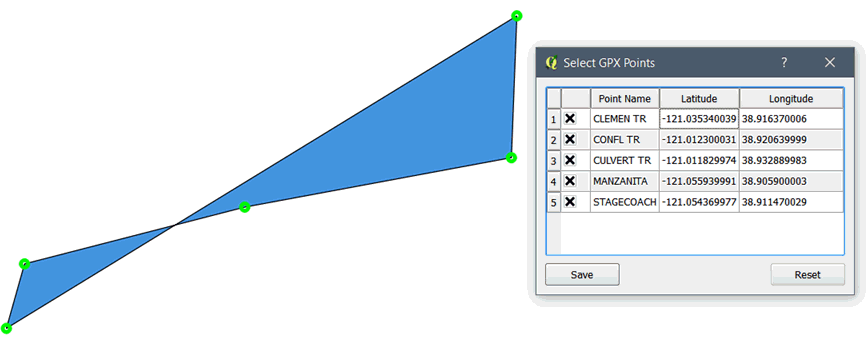
The table enables you to choose points you would like to import. This is
achieved by clicking on the checkbox shown on the first column of the
table if it is not checked.
6. Remove points that are not needed or points that are wrongly recorded by removing the selection. To remove the selection, click on the checkboxes on first column.
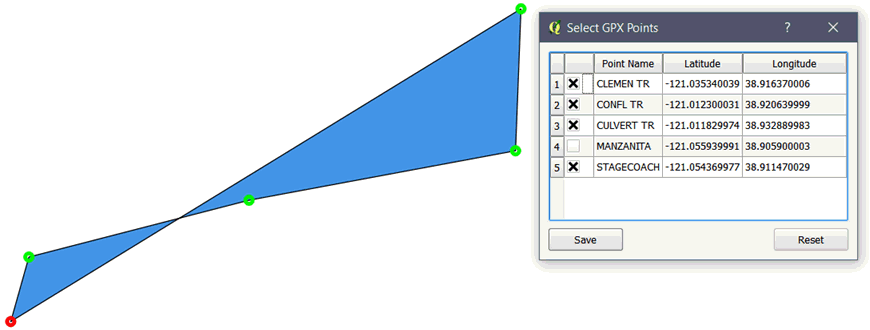
A removed point, from which the checkbox selection is removed, can be seen with a red round marker on the map. On the above figure, the bottom left corner marker is red in colour, indicating that it will not be included in the feature generated from the GPS points.
An included point, with a checkbox checked, can be seen with green round marker on the map, as shown in the figure above. This means that the points with a green round colour will be included in the feature created from the GPS points.
Once you finish choosing points, click on the Save button to temporarily save the feature.
7. The entity's form pops up to enable you save attribute data with the geometry as shown below.
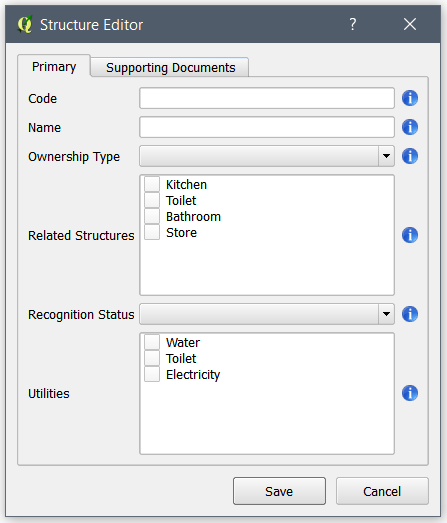
Fill out the form with relevant information uploaded supporting documents if needed.
Click on the Save button to add the feature into the spatial entity with its attribute data added using the form.
You can check the result by viewing the added feature in the map canvas and its attribute data in the entity browser.
If the feature is a line, a line will
be drawn when the user selects the corresponding vertexes comprising the
line feature.
Similarly, for a point feature, only one point is selectable to import to STDM database.