
We can import data contained in a CSV (Comma Separated Value) file format created in Microsoft Excel and similar products. The following sub-topics enable you to format your data so as to easily import it into STDM database without an error.
Importing a CSV file with a date data could fail with an incompatible format in the CSV file and the database. Thus, to properly import data, the date format in the CSV file should be the same as the STDM database.
The STDM database uses the same format as your computer date format.
To know your computer date format, follow the steps below.
1. Look at the Taskbar date format.
2. Hover on the date to know which one is the date, month and year (see the image below).
The image above shows the date format is m/d/yyyy. In other words, month number, date number, and the year separated by forward slash. The format could differ from computer to computer based on your system language. The above date format is based on US English language.
Accordingly, the date to be entered in the spreadsheet/CSV file should be in the same format.
For instance, if the original data has a format of 23/05/2013, it should be formatted to 5/23/2013 in the CSV file so that STDM can accept it.
Note: If you are importing it into a Server, contact the system administrator to identify the correct date format.
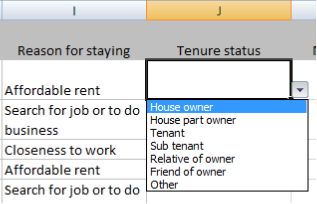
Drop-down list makes data entry easier in Excel and restricts data recording to that in the list.
This eliminates typing errors as well as saving on time. A drop-down list can be in column or row format.
Steps to follow when creating a list in Excel column:
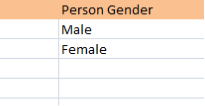
1 Define the entries for the list in the order you want it to appear e.g. [Male, Female}
2 Type the list in the given cells without having a blank cell in-between.
The list may be in the same or different worksheets.
For a list in a different worksheet, type the list on that worksheet and define a name for it.
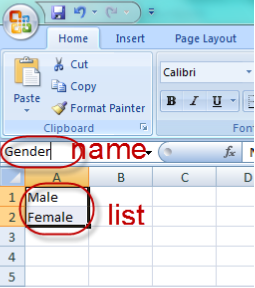
On the working sheet, select the cell you want.
On the Data menu, click Data Validation.
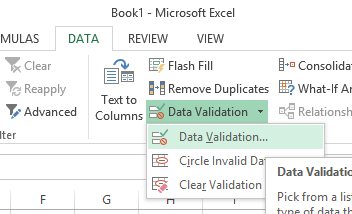
Click the first tab Settings tab in the new dialog window.
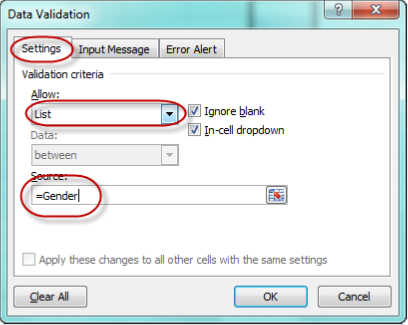
In the Allow drop-down box select List.
Specify the source of the list;
If the list is in the current worksheet, enter a reference (range) to your list in the Source box
If the list is in another worksheet, enter the name that you defined for the list in the Source box.
In both cases, make sure that the reference or name is preceded by an equal sign (=).
To specify whether the cell can be left blank, select or clear the Ignore blank check box
Select the cell within the list
Click the Data menu and then click Data Validation.
In the Data validation dialog box that pops up and click the Setting tab and then click Clear All button at the bottom of the dialog.
For more information, go to:
The example uses random cells numbers.
To extract and capitalize the first name from the name collection, use the following function:
=IFERROR (PROPER (LEFT (A2, (FIND (" ", TRIM (A2))-1))),"")
To extract and capitalize the last name from the name collection, use the following function:
=IFERROR (PROPER (RIGHT (A2, (LEN (TRIM (A2))-FIND (" ", TRIM (A2))))),"")
To extract and capitalize sex information if defined as MALE, FEMALE, M or F in the Sex collection, uses the following function:
=IF(D2="MALE",PROPER(D2),IF(D2="M","Male",IF(D2="F","Female",IF(D2="FEMALE",PROPER(D2)))))
To check if an integer cell is defined or set as a blank text if specified as zero:
=IF (F2>0, F2,"")
To set an option cell as a blank text it’s specified as NA:
=IF (W2="NA","", PROPER (W2))
For more help, visit